Showing posts with label Face. Show all posts

26 February, 2017

Review: Bobbi Brown Long-Wear Even Finish Foundation

No, just no.

 photo b46cc23e-d7dc-4dd3-a65d-420c4f07f9b0_zpsoxfp7r6o.jpg

+ Facts

$72
30ml / 1fl.oz.
SPF15
Glass packaging with a pump
Shade 4.5 Warm Natural

+ Thoughts

Longevity. My oily skin 1 - This foundation 0. This foundation is not a match against my oily skin and I'm an oily mess within a few hours. I would go as far as saying that this is the worst liquid foundation that I've tried in the longevity department. So much for "long-wear".

Coverage and colour. Medium coverage. I do enjoy the colour of Bobbi Brown foundations in general. They have a good amount of golden and yellow tones. I also own the Skin Weightless Powder Foundation in the same shade and both match me well.

Application. This foundation does not spread well across my skin and sort of tugs. I use a round kabuki brush (Sigma F82) to apply it. I find myself having to apply more product than I normally would and spending more time to blend. A primer is required for a smoother application.

+ Verdict

3 / 10

03 January, 2014

US Makeup Haul

If you know anything about the price of makeup in Australia, you would know that is it an absolute rip-off and is something I've ranted about on numerous occasions on my blog. So it really should surprise you that I bought a good amount of makeup while I was there.

I had so much fun checking out all the drugstores and I also visited the e.l.f Studio on Broadway which was awesome. And of course my trip wouldn't have been complete without going to Sephora. I absolutely loved it. Only downside was my holiday was during the weeks leading up to Christmas so the stores were always packed and super crowded. Definitely didn't help that I tended to visit the busier stores i.e. Times Square and the one near Macy's on 34th. Anyway, who doesn't love a makeup haul, so here we go!

 photo cca8d69d-ca98-484a-a109-ab89e6612490_zpscd2d5019.jpg
  • Shiseido Ultimate Sun Protection Cream SPF 50+ for Face
  • Maybelline Color Tattoo 24hr Cream Gel Shadow - Barely Branded
  • NYC Smooth Skin Bronzing Face Powder - Sunny
  • YSL Rouge Pur Couture The Mats Lipstick - 202 Rose Crazy
  • Essie Nail Polish - Fiji
  • Urban Decay All Nighter Long-Lasting Makeup Setting Spray
  • L'Oreal Voluminous False Fiber Lashes (Waterproof)
  • Make Up For Ever HD Primer
  • Maybelline Color Sensational Lip Liner - Clear
  • Make Up For Ever Full Cover Concealer - 7 Sand
  • MAC Studio Fix Powder Foundation - C4
  • MAC Eyeshadow - All That Glitters
  • L'Oreal Voluminous Mascara (Waterproof)
  • MAC Sheertone Blush - Gingerly
  • Inglot 20 pan palette (empty)
  • Inglot Eyeshadows x 3 (most of the shadows I already owned)

 photo 1cf098bb-ec94-4eb9-b8eb-375300d2acfc_zps908724ee.jpg
  • e.l.f Eyelid Primer
  • e.l.f Studio Complexion Brush
  • e.l.f Studio Powder Brush
  • e.l.f Studio Small Stipple Brush
  • e.l.f Studio Flawless Concealer Brush
  • e.l.f Studio Concealer Brush
  • e.l.f Studio Contour Brush
  • e.l.f Studio Small Smudge Brush
  • e.l.f Daily Brush Cleaner

Hope you enjoyed having a peak at my new stuff.  I will have reviews for some of these items up in the future.  I'm contemplating whether or not to post a haul for all the clothing/accessories I bought.  Anyway I'll see how I go.  Have a good weekend!

 photo bddcad9c-e019-439f-a74b-41fdb8eae685_zpsf58be68c.jpg

13 September, 2013

Recent Haul: Shoes and Daiso Makeup

I actually bought these things over a month ago, but didn't get around to taking photos and all that til now.

I bought 2 pairs of shoes from the Tony Bianco warehouse sale in Collingwood. 

 photo Fotor0908124250_zps5e204ced.png

To be honest, Tony Bianco heels have to be one of, if not the most uncomfortable and unflattering heels in my opinion. I think their shoes are more catered to those with skinner feet, I have very wide feet. Plus, I find the angle that they make your feet sit very steep and just awkward. That being said...I love these heels. I think the colour and design is SO pretty and they were marked down to $30! Yes, they are uncomfortable and yes, they are very unflattering on my feet but when you are in a warehouse surrounded by other women grabbing at shoes...it does things to you lol.

I haven't worn them out yet and I'm undecided about if I want to keep them or sell them.

 photo e8843fa2-11b6-4a06-8aeb-22ded7d09d7a_zps82d6d9f2.jpg

I needed some new flats firstly because my current ones are on their final leg and I'll need some for work next year. The Tony Bianco flats I already have are really comfortable so I hope these are too. I thought the big buckles made them more dressy and hence suitable for work and play.

I bought a pair of Basque loafers from Myer while they were having their further 30% off sale prices sale.

 photo f1884268-d15b-469e-94ab-04ebfa5c9af4_zps7edcbb88.jpg

I've never really been a fan of loafers. Most of the ones I've tried look odd on my feet and make my feet look even wider. But these come up a bit higher in the front so they are more flattering. They're not my usual style, I call them my grandma shoes lol. Thought I'd give them a go since they were marked down.

Finally I had an itch to try Daiso makeup. I picked up a mascara and some powder. I plan to review these products sometime soon.

 photo e5c663b3-7302-41c6-840b-37ac8ba57f04_zpsc12b42ac.jpg

 photo bddcad9c-e019-439f-a74b-41fdb8eae685_zpsf58be68c.jpg

24 October, 2011

My Mecca Maxima Makeover!!

Hey guys!! This is going to be a MASSIVE post, so brace yourselves!

I had this AWESOME experience 2 weeks ago.
Mecca Maxima in Melbourne Central is holding a series of free events on a number of dates where basically you can rock up and learn some tips and tricks and receive some free samples.

So the day I went, they had the "Show Stoppers" event where you would get a mini session with a makeup artist who'd show you some tips and ideas when getting ready for a party. I thought I may as well just drop by after uni and see what I learn. A makeup artist named Amy took care of me, she was SO sweet, helpful and honest. Not only did she give me some tips but she gave me a full face makeover!! Everything from skincare to makeup. I was SO excited because I have never gotten my makeup professionally done and I was able to pick the brain of a really experienced makeup artist. She did a really god job with my makeup, the way she did things was different to how I usually do my makeup which was great as a learnt new ideas and some things that I thought I wouldn't be able to pull off actually worked and looked good.

I thought I'd share some photos of the makeover. Excuse the average hair and all that, I rocked up to Mecca after uni and it was a pretty warm day, so by the time I got home to take the photos, my face was getting oily and hair getting messy. I tried to capature the makeup as best I can in the photos, but it was a bit difficult. I will also go through all the products Amy used, how she used them and if I like them.

Photobucket

Photobucket

Photobucket

SKINCARE 

After removing my makeup, she gave me a skin peel using Dr. Dennis Gross Skincare - Alpha Beta Daily Skin Peel. I was really nervous because I had never gotten a skin peel before and frankly "skin peel" sounds scary lol. But I had nothing to worry about at all. There are 2 steps to this product. You wipe the first cotton pad, which is already soaked in a solution, all over your face. So this is basically the chemical exfoliator. Then you go in with the second step, do the same thing but this time the cotton pad is soaked in a neutralising solution which stops the first solution from working and lets your skin go back to normal. I LOVE THIS STUFF! It made my skin feel so soft and smooth and it looked so radiant. Flakeyness was removed and some pores were cleared. It is absolutely amazing. Makeup looked so much better on my skin after using this. However the product is rather pricey, $130 for 30 uses, which includes both steps. But I did manage to find it on Strawberrynet for about $77. I have never forked that much for skincare...but I may have to in the future because I can't stop thinking about this product lol.

Next Amy moisturised my skin using
Murad - Skin Perfecting Lotion ($50). She told me it was a moisturiser but also had some treatment qualities. It would help balance out my skin since I have very oily skin and also improve the texture and general look of my skin. This lotion is actually quite thick which I was concerned about due to my oily skin. It feels a bit much when you first put it on, but if you let it settle a little, it feels light and really moisturising and my skin felt healthy. I ended up purchasing this (that is the most I have ever spent on skincare), I've been using it more as a night treatment as opposed to a daily moisturiser. Still love the light but super moisturising feeling. As for the treatment side, I haven't noticed any changes to my skin but I haven't been using it that long. So at this stage, I like the product but I'm not to sure that it's worth the $50. 

FACE

Amy decided that her aim was to focus on my skin and make it look amazing since it seemed to be my primary concern. So after prepping it with those awesome skin care products, she spent a lot of time working on face makeup.
 

Primer : Smashbox - Photo Finish Foundation Primer Light
I already owned this product. Still love it, makes your skin looks smoother and keeps your foundation matte and fresh for longer. But she used much more product than what I would usually use. She stressed the importance of using enough since it's the barrier protecting your skin. 

Highlighter : Nars - Multiple - Luxor
She applied this on my cheek bones and up to my temples before applying foundation which I thought was interesting. I had heard of people doing this, but I always thought what's the point since your foundation is just going to cover it all up. To my surprise the glow came through, it was a nice and subtle inner glow. You can see it in the close-up picture.
Photobucket

Foundation
: Nars - Sheer Glow Foundation - Punjab
I was definately apprehensive about her using this foundation. I knew that many people love this foundation. But if there is anything I avoid when buying liquid foundation is "glow." Glowy/dewy foundations just get oily too quickly on me. I was very impressed at the way the foundation could be built up. She showed me how it looked with s sheer application and then she built it up. The general appearance of the foundation was also very natural, it looked like real skin. Definitely purchasing this in the future. 

Concealer : Nars - Conealer - Ginger
A full coverage concealer in stick form. Not really much to say about it lol She used it just like any other concealer and I thought it did a good job covering these 2 HUMUNGOUS zits I had on my face. 

Setting Powder : I don't remember

Bronzer : Stila - Sun Shade SPF 15 - Shade 2
I don't use bronzer much. When I do, I've been using more cool/neutral toned bronzers for contouring and I don't usually use it for all over. This product is more bronzey...kinda more orangey toned...but NOT in a horrible fake way. It added a nice glowy and alive look. She dusted it all over my face. I think she may have added a bit too much for my liking. I will definitely look into getting a bronzer with more of this tone.
 

Blush : Nars - Blush - Desire
I requested to use this blush since it's on my wishlist and I just wanted to confirm whether I wanted it or not lol. Still love it, still REALLY want it. She did a really light dusting to show me its versatility. She also pointed out that another makeup artist was wearing it, she had a totally different complexion to me and it looked totally different on her but still amazing. 

EYES

I was pretty happy with the eye makeup. Many makeup artists tend to struggle on Asian eyes or just make us look all kinds of weird lol. Amy did a great job. Unfortunately I had a hard time capturing it in the photos.
 

Primer : Too Faced - Shadow Insurance
A classic product. I already owned this. Makes your shadow appear more vibrant and fresh for longer. Reduces creasing. 

Eyeshadows : 
Stila - Baked Eye Shadow Trio - Gold Glow
She used the gold from this trio on the inner half of the lid and the brown on the outter half. Very pigmented and metallicy.   
Nars - Eyeshadow - Fez 
A medium-deep shimmery brown shade with I think a red undertone. She used this to deepen up the outter corner a bit.
Nars - Soft Touch Shadow Pencil - Aigle Noir
This was applied along my bottom lashline and smudged out to look really smokey and sultry. This black pencil actually had some gold in it which was really pretty. When I normally apply eyeshadow under my eyes and smudge it out, I keep it very close to the lash line. I always thought that smudging it too far down would make me look tired. So it surprised me when it didn't lol. I thought it looked really sexy and sultry. Definitely going to experiment with this more myself.

Eyeliner :
Bobbi Brown - Long-Wear Gel Eyeliner - Violet Ink

I loved this! I am pretty conventional when it comes to eyeliners, I pretty much only use black and brown. But this purple looked wow. I'm so annoyed the camera didn't pick it up. She used it along my upper lid and also on my bottom waterline. I used to like applying eyeliner to my waterline. But for some reason stopped. So I hadn't done that in a while. When she applied some of this to my waterline, it brought back memories lol. Again I was surprised that the purple looked SO good! and lining my waterline added drama n definition as well as adding to the sexy sultry eye look.

LIPS

Stila - Lip Glaze - Amaretto

I'm more of a lipstick girl than a gloss girl. And definitely more into pinks than nudes. Amy decided to go with a nude lip, just to do something that I normally wouldn't do. I actually really liked the look. The lip glaze was pretty pigmented, shimmer free which I like, pretty long lasting and super moisturising. I really liked the colour. It allowed my natural lip colour to peak through a bit which I thought was really nice.


Photobucket

I think that was everything lol. I was really happy with the look. The highlight product for me was the Dr. Dennis Gross Skincare - Alpha Beta Daily Skin Peel, love it, will have to save some money and build the confidence to spend that much money on a skin care product lol. I felt that Amy definitely achieved her goal of making my skin the stand out feature. My skin isn't the best in the world but she made it look and feel the best I've ever seen it. Hope you aren't too bored after reading that massive post.

Photobucket

03 October, 2011

Review: Australis - Ready Set Go Finishing Powder

Over the past year or so, 
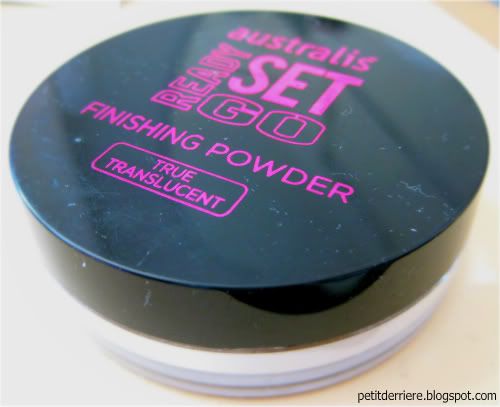
Australis, has been revamping their products and image and they've come out with a bunch of new things, one of which being their Ready Set Go Finishing Powder. It costs $12.95 at Priceline but you can definitely get it for cheaper if you wait for a sale (which is what I always do lol).

Photobucket

The Product

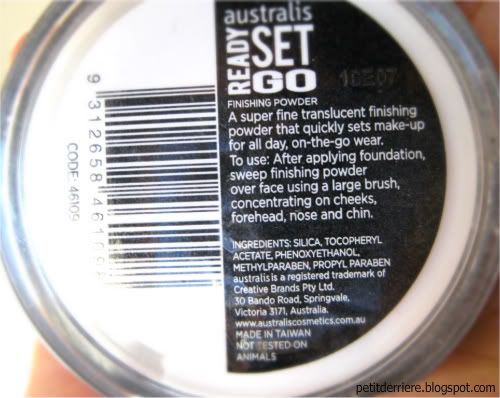
It is a fine white loose powder which goes on translucent. It feels super smooth, kind of...velvet-y? Satin-y? Not sure how to describe it but it feels like primer but on top of your makeup. It helps to mattify your skin and also makes your skin appear smoother. You really only need the tiniest bit even when applying it to your whole face.

Photobucket

How I use it - Why I like it

Photobucket

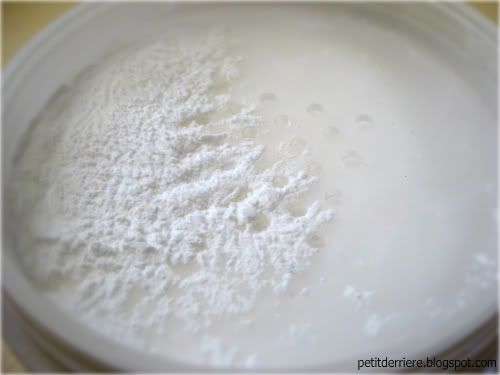
The main purpose I use this powder is to prevent my mascara from smudging. It doesn't matter what mascara I use, I will get some level of smudging, even if it's waterproof. I like to use my finger to apply it under my eyes and it really helps with my smudging situation. Sometimes I just use regular face powder, but packing that on can look a bit cakey or make your undereye area look dark. So I love it for this purpose.

I also like to dust it over my whole face after applying makeup. Especially when I'm using mineral makeup because I find that I get oilier faster. This helps to keep it matte for longer. But doesn't completely prevent it since I have really oily skin.

When using cream blushes, you can use this to set the blush if you don't want to use a powder blush on top.

Why you may not like it

Despite it being "translucent," I think on darker skin tones it could give off a white-ish tinge to your skin. Also, in photos it can also give a white tinge. As I found out recently, since I like to pack a fair amount under my eyes, that area turns white in flash photography lol. But if you only apply a little bit, like a dusting all over your face, (you don't need much anyway), it looks fine.

I wish the sifter had one of those sliding covers that you can slide over the holes after each use, like the Everyday Minerals products.

Concluding thoughts

Overall, I really enjoy using this product, I use it on a daily basis at least for my undereyes. I don't think I'll be needing to repurchase this any time soon because there is so much product in one container and I use very little each time.
Photobucket

21 March, 2011

Benefit That Gal Brightening Face Primer review (plus Fab Lane set)

Photobucket

Hey guys!

I bought Benefit's That Gal Brightening Face Primer at the end of last year as a part of the Fab Lane set. I didn't really need any of the stuff in the set, but Myer was selling the set for half price (~$57 AUD) and I was in a splurging mood lol. Of course, who can resist the cute packaging!

Photobucket

Photobucket

Anyway, my reviews on the other products in the set will be coming later. Now for That Gal...

Price & Quantity

The tube has 11ml of product and according to Beauty Heaven, costs $53 AUD alone.

Packaging

It looks very much like a glue stick and is about the same size as one. The dispenser part is very unique. You twist the bottom and the product comes out of little square holes on the top. I haven't had any problems with this, but it is definitely very gimmicky. A simple squeeze tube would have been sufficient.

Photobucket

Colour & Quality

From the above picture, you can see that the primer is a light, kind of milky pink colour. It is very creamy. When I apply it, it doesn't show up as pink and applies virtually colourless. If you looked really really really closely though, you might see the slightest pink tinge. There are no shimmers or glitters in this product.

The product gives your face a dewy finish. It doesn't do much else aside from that. I don't find that it makes my skin smoother nor help my foundation stay fresh longer.

Overall

Personally, I think as a primer, That Gal fails as it doesn't help to improve the appearance of your skin nor the wear of your foundation. But if you are looking for more of a brightener, highlighter, illuminiser or dewy kind of product, this may be for you. This product would be good for those that like a dewy finish to their face. You could apply this under or on top of foundation that you might feel is too matte. I'm not really into the dewy face look mainly because my face gets SO oily during the day. It could also be applied on some areas as a very subtle highlight or brightener, emphasis on "subtle." This is what I've been using it for. As I like having a very matte face, sometimes it can look very flat and blah, despite me not liking a dewy finish to my whole face, I do sometimes enjoy having a little bit on my cheekbones, and getting a slightly glowy and illuminised effect. That being said, I think there are better and cheaper products out there for this purpose.
Photobucket

24 February, 2010

Kiss and Makeup Haul & Swatches

I received my products from Kiss and Makeup a couple of weeks ago. So this is what I got:

Nars blush in Orgasm (left) and Deep Throat (right).
Photobucket

Here's a swatch of Orgasm (sorry I don't have a swatch of Deep Throat because that was a present for my sister):
Photobucket

Orgasm is a peachy pink blush with lots of very fine gold shimmer giving it that shimmery/sheeny finish. I find that it is not really sheer nor super pigmented, so somewhere in the middle and it does have pretty good lasting power.

I also got the Laura Mercier Secret Camouflage in SC-3.
Photobucket

I love the idea of having the two shades. This is quite a dry matte concealer, so it can look a bit cakey. These shades are too light for my skin tone. The darker one is 'acceptable' i suppose, but you can still tell it's too light.

Hopefully it won't be too long before my next post =)
Photobucket

30 October, 2009

Request - Contour that face!

Photobucket

Sorry I haven't posted anything for a while, I've been super busy with work and exams are next week arghhhhh!

Anyway, so i thought I'd squeeze in this post before i disappear over the next couple of weeks for exams. Well, my beautiful friend Triana asked me a while ago for a little guidance with contouring so voila! lol (sorry I took so long to do this post).

It was so hard to get the contouring to show in photos and taking photos of the steps was difficult too...I probably should have tried making a video...maybe next time =) Anyway so here's how I like to contour my face.

So first put on your foundation as per usual. Then you need a contouring product. There are some products specifically for contouring out there but you can also use bronzers, blushes or foundation. I use Maybelline Dream Matte Mousse - Tan. This shade is much much much darker than my skin tone. Just for you guys to get an idea, the Maybelline Matte Mousse shade that matches my skin tone is Sandy Beige.
Photobucket
With the mousse, draw a line from near the top of your ear to almost the corner of your mouth. This is where you want your face to look more hollow and angular.
Photobucket

Then blend it in with your fingers so there are no harsh lines. Try to blend down below the line more than above because you want your cheek bone above the line to be more highlighted and brighter. Add a bit of powder to set it and you are all done!

Before:
Photobucket

After:
Photobucket

Sometimes I use my Max Factor - Natural Brush-On Satin Blush in Subtle Amber to contour. It's a pinky brown colour. Any blush that has more brown or grey undertones is fine. I hold the bristles of my blush brush together so it's flat and squashed together so I have more precision. I apply it around the same place I would draw the line with the foundation and then blend it out.
Photobucket

Well that's how I contour. Hope you guys enjoyed and hope that was helpful Triana!
Photobucket

LinkWithin

Related Posts Plugin for WordPress, Blogger...