09 April, 2013

Illamasqua Australia Fight for a Fair Beauty Price

 photo fb31970b-c104-4049-8120-d6f7b3b116bf_zps0cb55ef1.jpg
I'm pretty late on the bandwagon for this campaign. I believe it started about 8 months ago. So for those of you who haven't heard about it, Illamasqua is basically campaigning against the ridiculously high prices that us Aussies have to pay for beauty products in comparison to other countries. They have started a petition to put pressure on other cosmetic giants to lower their prices have also slashed the prices of their own products in Australia permanently.  (Click here to learn more and to sign the petition.)

Personally I think that this is a fantastic campaign. I completely agree that Aussies are paying far too much relative to the rest of the world. Plus it seems even more ridiculous at the moment when the Australian Dollar is performing so well and is worth more than the USD (conversion rate 9 April 2013: USD$1.00=AUD$1.04). Here's what I mean:

Prices as at 3 April 2013
Product US Price Aus Price
Revlon Super Lustrous Lipstick USD$7.99 AUD$21.95
Revlon Colorstay Makeup (Foundation) USD$13.00 AUD$34.95
MAC Studio Fix Fluid Foundation USD$27.00 AUD$49.00
Bobbi Brown Creamy Concealer Kit USD$33.00 AUD$60.00

Some have called this campaign a marketing stunt and if they truly believed in the cause, they would just reduce their prices without all this attention-seeking publicity. Well, why not make some noise about it? Bring it to the attention of the public and unite those with the same belief. And most importantly, they slashed their prices! I don't know about you, but I sure as hell would want to know about that.

Others have also called this a scam because there is a line in the petition that says "If...the petition is successful I promise to continue to buy Illamasqua products in Australia." i.e. By signing, you have signed away your soul and now must buy their stuff. Come on, I highly doubt that Illamasqua is going to send a little Cosmetics Policeman over to Australia to ensure you keep this promise. If you want to buy some Illamasqua products at a reduced price, go for it. If you don't, then don't buy anything. You can still sign the petition and support the cause without the weight of the law coming down on you. Chill.

Bottom line, Illamasqua is still a business, marketing = sales, cheap prices = sales.

I strongly support the cause and now I can try some of their products (which I've been wanting to do) at reasonable prices. I ain't complaining.

 photo bddcad9c-e019-439f-a74b-41fdb8eae685_zpsf58be68c.jpg

04 April, 2013

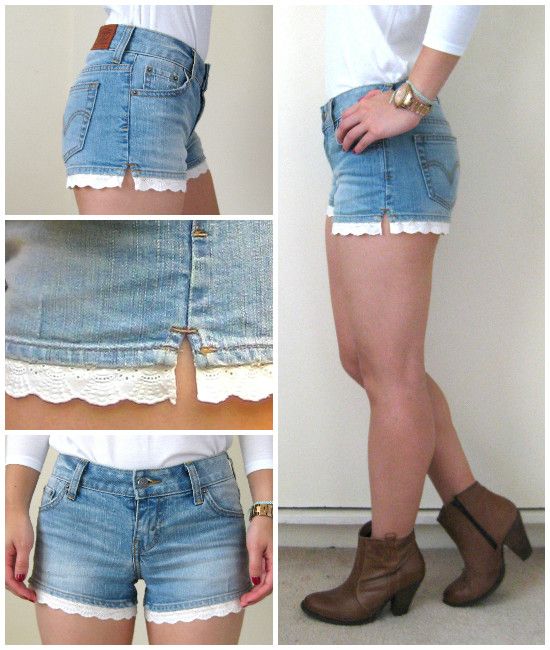
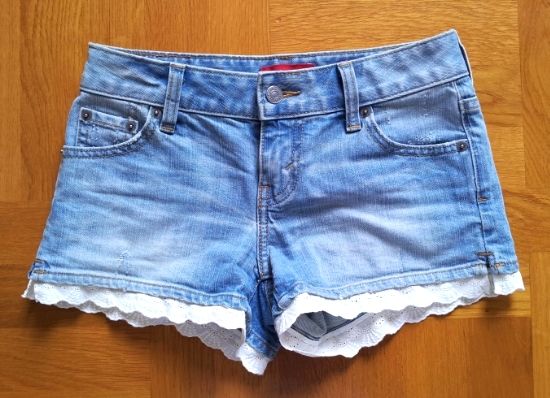
DIY: Broderie/Lace Hem Shorts

 photo Fotor0402124723_zps3fa8c6cc.jpg

This is a really simple and easy way to change up the look of some basic shorts, or in my case, to make my denim short shorts a bit longer to help cover up my saggy butt action which was peaking out the bottom (not a good look lol).

You can also use this technique on skirt hems, sleeves, anything!

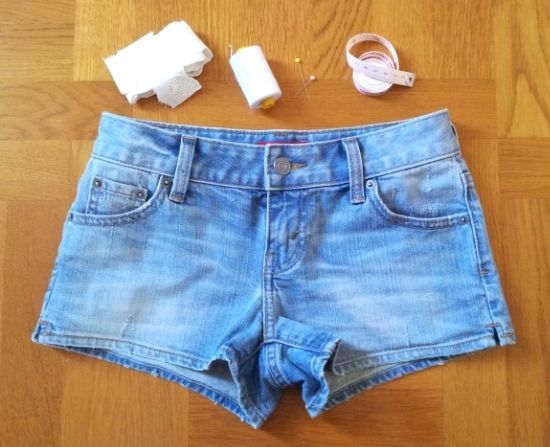
All you will need is:
  • Pair of shorts
  • Length of lace or broderie (I chose broderie because I thought it would be a bit more durable than lace. I bought mine from Lincraft.)
  • Tape measure
  • Needle and thread/sewing machine
  • Pins
 photo 2013-01-10154438_zpsff7ea8d9.jpg

Preparing the broderie/lace
 
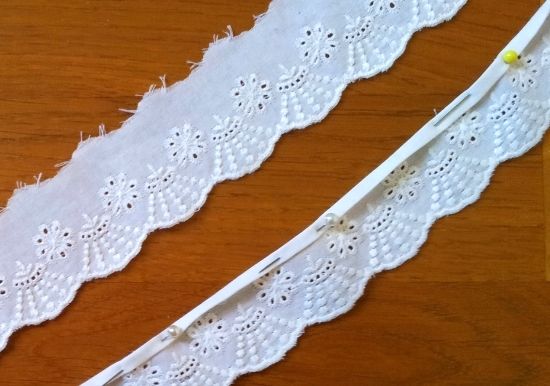
1.  Measure the circumference of the leg of your shorts and cut a length of broderie/lace which is about 3cm longer.
2.  As you can see, the top edge of the broderie hasn't been finished off and so is fraying, so I needed to fix that up.  (To save time you can just buy some lace/broderie where the edge is already cleaned up)
Fold the top edge over twice, pin it in place and iron it so the edge is crisp (as shown in the picture below).  I also did this to the 2 ends of the broderie.

 photo 2013-01-10155302_zpsedc95e4c.jpg

3.  Using a sewing machine, sew in a straight line on the edge of the folded parts to secure it down.

Attaching the broderie/lace to the shorts 

4.  Turn your shorts inside-out.
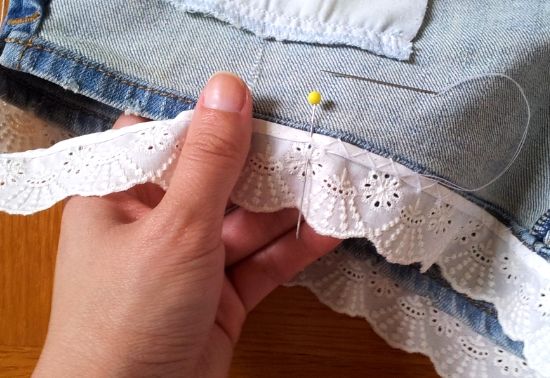
5.  Pin the broderie in place
6.  Sew the broderie onto the bottom edge of your shorts.  I chose to do this by hand with a zig-zag kind of stitch (sorry I don't know technical names lol) so that the stitching wouldn't be visible from the outside.

 photo 2013-01-12154503_zps9e04eb48.jpg

7.  Turn your shorts back the right-side-out and you're done!

 photo 2013-04-01143029_zpsde519bcf.jpg

 photo bddcad9c-e019-439f-a74b-41fdb8eae685_zpsf58be68c.jpg

30 March, 2013

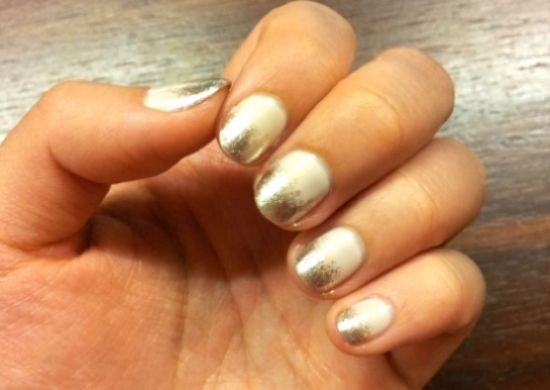
Nails of the Week: Gradient with OPI At First Sight & OPI Designer...de Better!

 photo 66206b9d-7002-4fd7-91b4-0ef82f9391ee_zps2c65ebe2.jpg

I love this nail look. So subtle but still with a bit of oomph, without being all up in your business lol.

I used 2 coats of OPI At First Sight for the neutral creamy base. Then used a makeup sponge to dab on OPI Designer...De Better! in layers, with each layer more concentrated at the nail tip.

Hope you're having a great Easter!

By the way, if you haven't noticed, my sister revamped my blog. It looks so much better than what I had before. I was getting so sick of the old look and I just felt it looked so tacky (with my crappy designing skills). But anyway, now it feels so fresh and bright and I'm very happy with it.

 photo bddcad9c-e019-439f-a74b-41fdb8eae685_zpsf58be68c.jpg

LinkWithin

Related Posts Plugin for WordPress, Blogger...